After Effects Pro Tips
Separate Dimensions on Any Property
I LOVE to use Separate Dimensions when animating the Position of a layer.
Unfortunately, you can't do that for scale or any other multi-dimensional property.
Or can you?
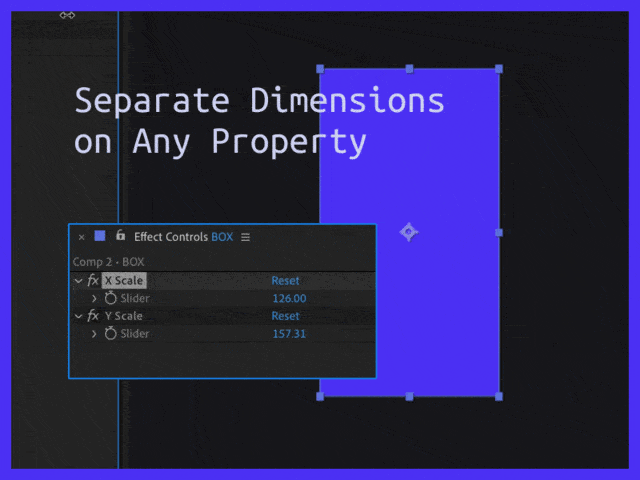
Here's simple way to Separate Dimensions on any multi-dimensional property.
Add 2 Slider Controls to your layer. Effect > Expression Control > Slider Control
- Rename the Slider Controls to Scale X and Scale Y
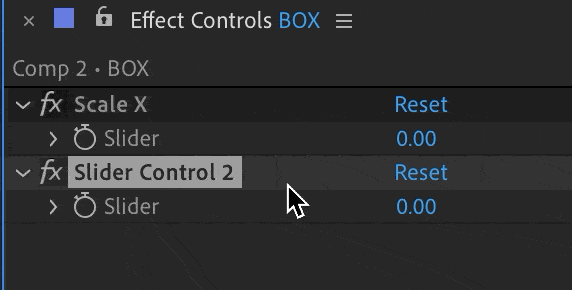
Now on your chosen property, Option/Alt + Click the stopwatch to Add an Expression
Add this expression to the Property (Scale for my example)
If you did everything like I did, it will look like this!

Now you can animate X & Y separately using the two slider values!
And you have easy control of the graph curves for X & Y instead of the mess you had before.

Animation takes a lot of work
The final tip of the day: animating is a time-consuming process and sometimes the best advice is to just put in the work.
I know this isn't the sexiest thing to hear, but it's true and once you accept this, your animation will start to improve.
But speed doesn't equal the best results.
We all are tempted to look for hacks, tricks, and plug-ins to make things easier.
But sometimes you need to sit down for several hours, remove all distractions, and lay down some keyframes. Tweak some curves. Add custom smear frames. Manually keyframe masks to fill in gaps.
Want some proof?
In this example, Patrick Butler painstakingly layered out every feather of a bird in Photoshop, before applying animation in After Effects to bring this still photo to life.
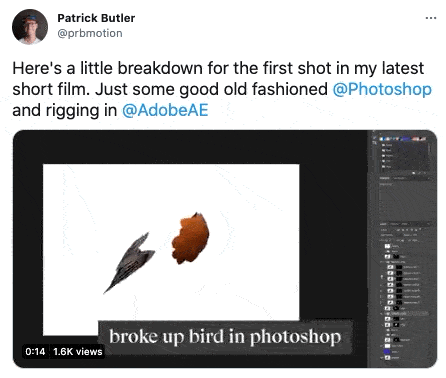
If you look at that tweet, he also shows how he included some rigging and expressions to control all the layers with one Null. A perfect mix of labor and efficiency.
Could he have animated it simpler using fewer layers and some turbulent displace? Sure.
But, the work is what brings it to life. Big kudos Patrick.
Another Example
In this timelapse, Alex Deaton shows how he spent who-knows-how-many hours manually keyframing the physics of 57 ballz.
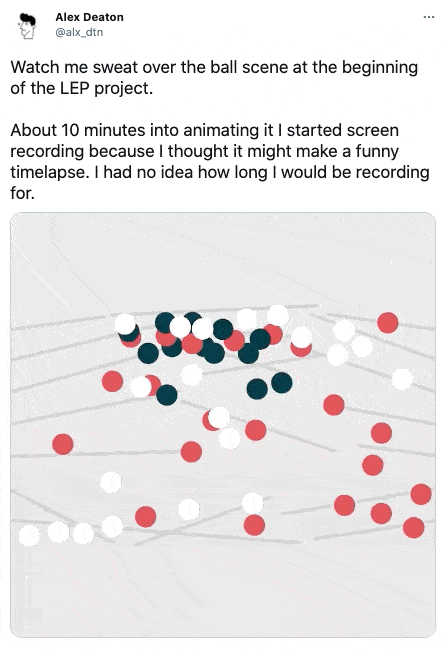
by Alex Deaton
Could he have simulated the physics? Definitely.
But in Alex's words "I've had trouble with Newton in the past, tried briefly to simulate in c4d (failure), decided to just go for it."
I've been in the same spot, and at the end of the day, remember... Pain is temporary. Deadlines and results are forever.
In conclusion...
I'm not saying that you need to have slightly masochistic tendencies to get into animation...
but I'm not saying that it won't help.
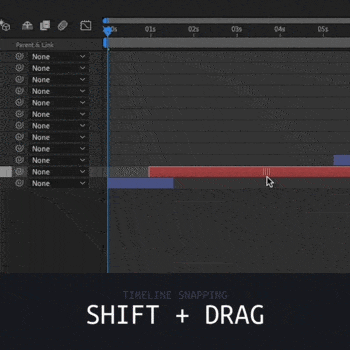
Snapping in the Timeline: Shift + Drag
Speed up your workflow in the timeline panel with snapping.
Hold down Shift while you drag, and your layers will snap automatically. The playhead will snap to in & out points, composition markers etc. It's very intuitive and saves a lot of time compared to manual zooming in and bumping things frame by frame.
Shift + Drag = Snapping in Timeline
Procreate to After Effects Workflow - Create complex animations
Want to know how to combine hand-drawn animation in procreate with simple effects in After Effects to create some surprisingly complex results?
Here's a quick workflow by Fraser Davidson.
Fraser Davidson's glorious twitter thread breaks a workflow from hand-drawn animation elements in Procreate to compositing in After Effects.
The real value in this thread isn't the specific effects or technique of using Procreate. This is a reminder that After Effects works best when you layer simple techniques to produce a complex result.
Throw in some hand-drawn or organic assets and you have a unique look that appears more bespoke and complicated than it really is.
Go check it out and think about how you can apply this strategy to your own unique applications.
Here's another thread about the same technique to get your juices flowing
Learn more 🕺🏻
Fraser was one of the first people I discovered in the motion design industry years ago when I started to realize After Effects could be used for more than explosions, muzzle flashes, and blood spurts.
His team puts out a massive amount of high quality work and have shared several helpful courses on Skillshare including a class for this Procreate + After Effects process.
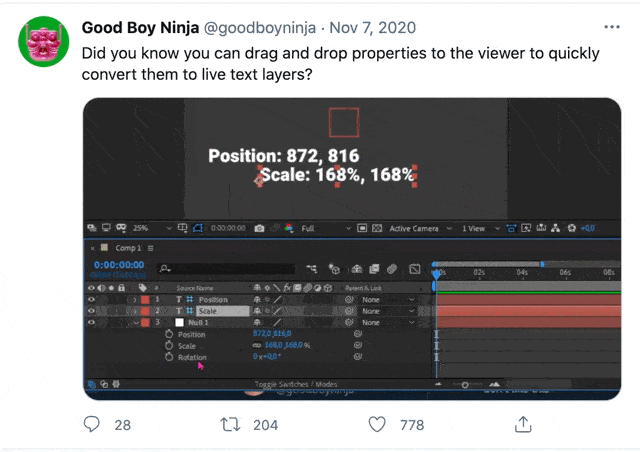
Drag & Drop Properties to create Live Text Reference Layers
Click and drag a property onto the Comp Viewer window to auto-generate a live text layer reading the value.
I love using this one to debugging expressions - sometimes you just need to see what your values are!
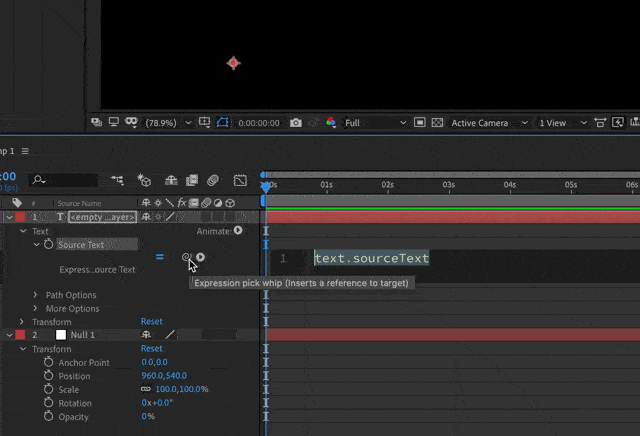
How does this work?
If you're new to expressions, the drag and drop workflow above is just a shortcut to a simple workflow that will be helpful to know!
Let's recreate that workflow manually
- Create a new text layer
- Twirl Down Text > Source Text
- Option/Alt + Click on the stopwatch to add an expression.
- Instead of typing an expression, drag the pickwhip to the property (on the other layer) you want to read. This will apply a simple expression that links your text value to the property value.
- That's it! Your text layer now reads the value and updates whenever it changes.
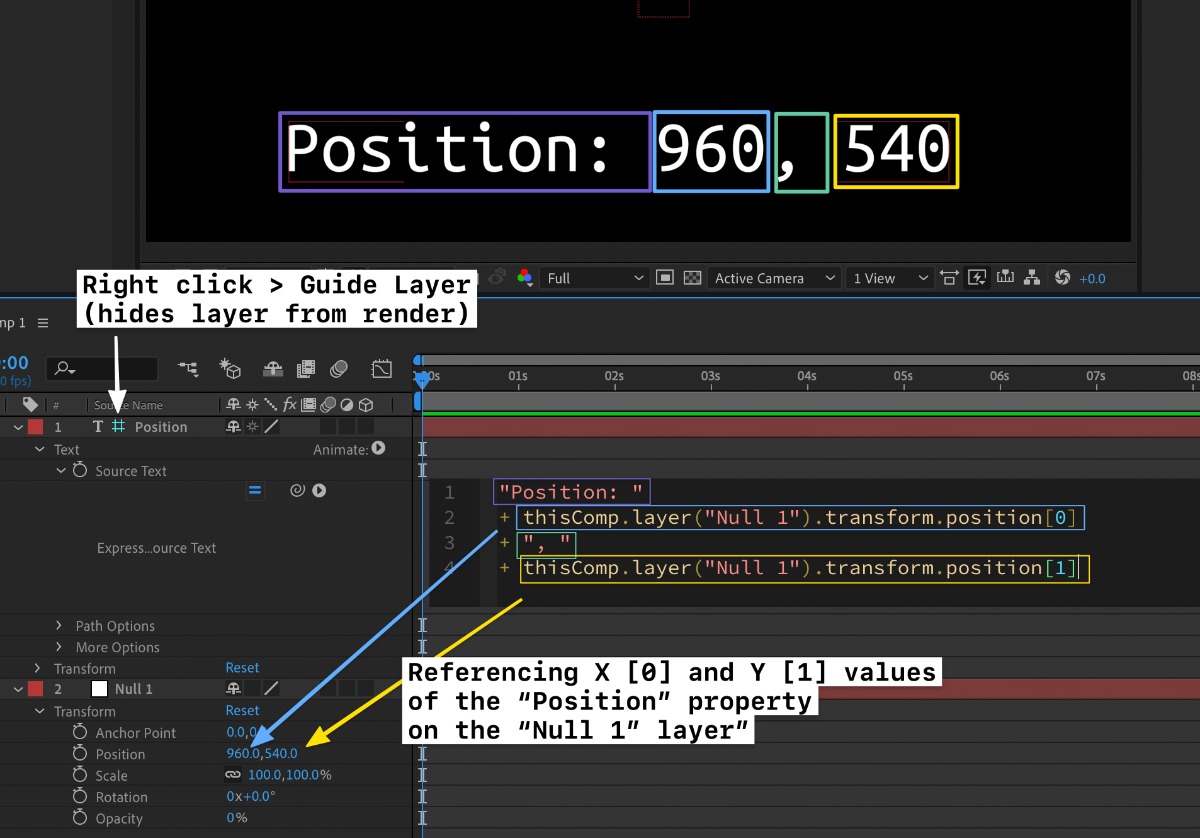
If you want to copy the format from the drag and drop workflow, you modify your expression to include the property name, separate dimensions, and more.
Radical!